Products
Solutions
Resources
9977 N 90th Street, Suite 250 Scottsdale, AZ 85258 | 1-800-637-7496
© 2024 InEight, Inc. All Rights Reserved | Privacy Statement | Terms of Service | Cookie Policy | Do not sell/share my information

Below the header on the issue record, there are three tabs for capturing the issue’s details, costs, and supporting documentation.
The Details tab is where you can record key information for understanding the nature of the issue and its potential impact. It is organized into the following sections:
Issue details
Issue description
Additional details
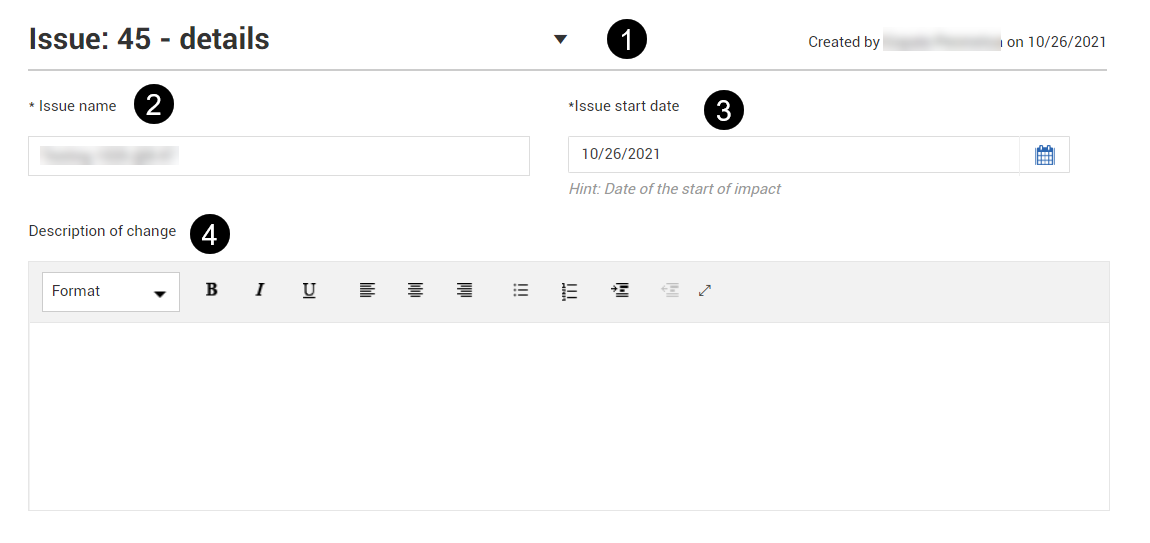
The issue details section includes fields that identify the issue.
|
Title |
Description |
|
|---|---|---|
| 1 | Issue navigation | Lets you navigate to other issues without having to go back to the Issue log. Click the arrow to see a list of issues, and then select one. The selected issue opens in the same window. |
|
2 |
Issue name |
|
|
3 |
Issue start date |
|
|
4 |
Description of change |
Free-text entry and editor for description of issue (auto populates from initial entry form). |
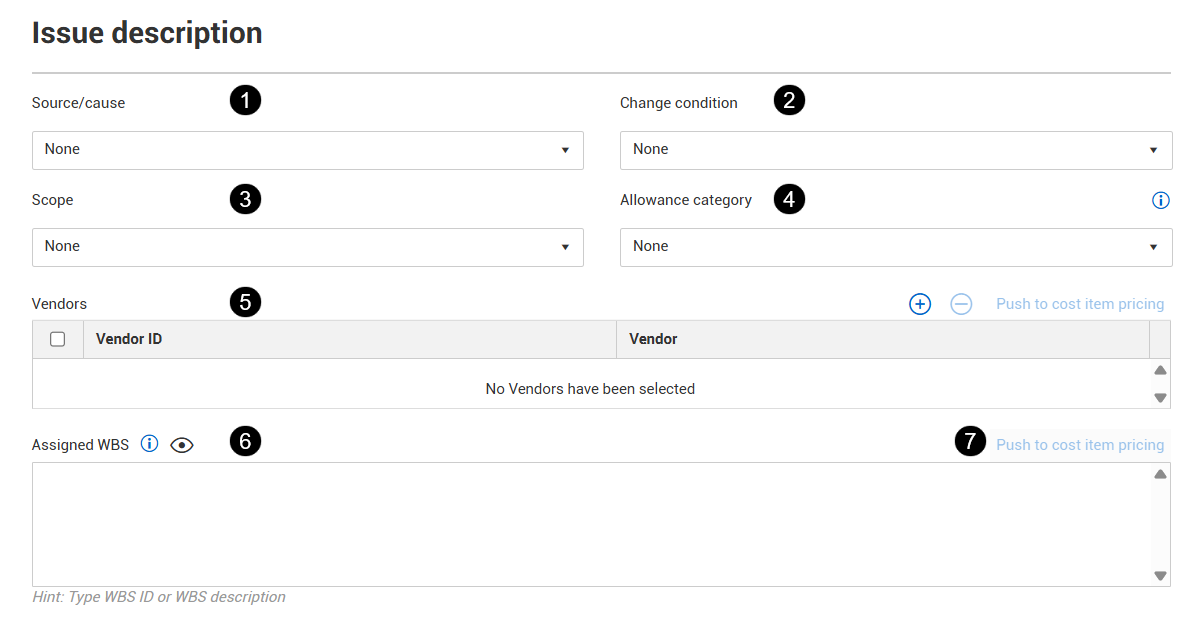
The Issue description section contains fields that help classify the issue.
|
Title |
Description |
|
|---|---|---|
|
1 |
Source/Cause |
Drop-down menu populated with general issue causes. The Source/Cause field identifies the underlying reason or root driver, such as an originating document, event, or instruction that initiated the issue. The source or cause typically requires investigation to determine why the issue occurred (for example, the initial soil analysis was incomplete or inaccurate). |
|
2 |
Change condition |
Drop-down menu populated with general conditions of change. The Change condition identifies the immediate event or circumstance that triggered the issue (for example, encountering rock in an area where soil was expected.) |
|
3 |
Scope |
Drop-down menu populated with scope identification of issue. |
| 4 | Allowance category | Category assigned to issue for tracking. |
| 5 | Vendors | An area where you can associate vendors to an issue without having to go to the Pricing page. |
| 6 | Assigned WBS |
Validated WBS structure to associate a code with your issue. WBS codes include all terminal cost items from InEight Control. WBS codes can be assigned from InEight Plan or Control, or from this section. If the project is imported again from InEight Estimate after the WBS is associated, you must manually update the issue with the new WBS code. |
| 7 | Push to cost item pricing | Automatically add the WBS codes to the cost item pricing for the issue. |
Associate one or more vendors to an issue when you have vendor information, but you are not ready to price the issue.
Vendors must already have contracts on the project to be able to be selected from the issue Details page.
From the issue's Details page, click the Add vendor icon in the Vendors field. The Select vendor dialog box opens.

Select one or more vendors from the Available Vendors list, and then click Add. The vendors are added to the issue.
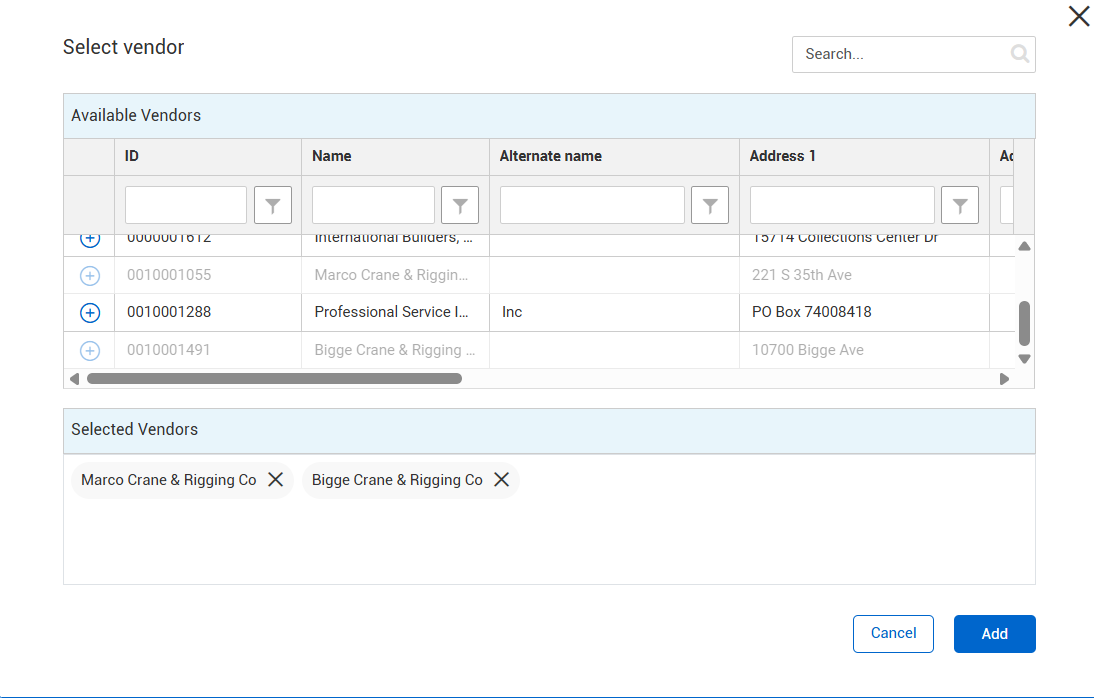
On the Details page, click Save.
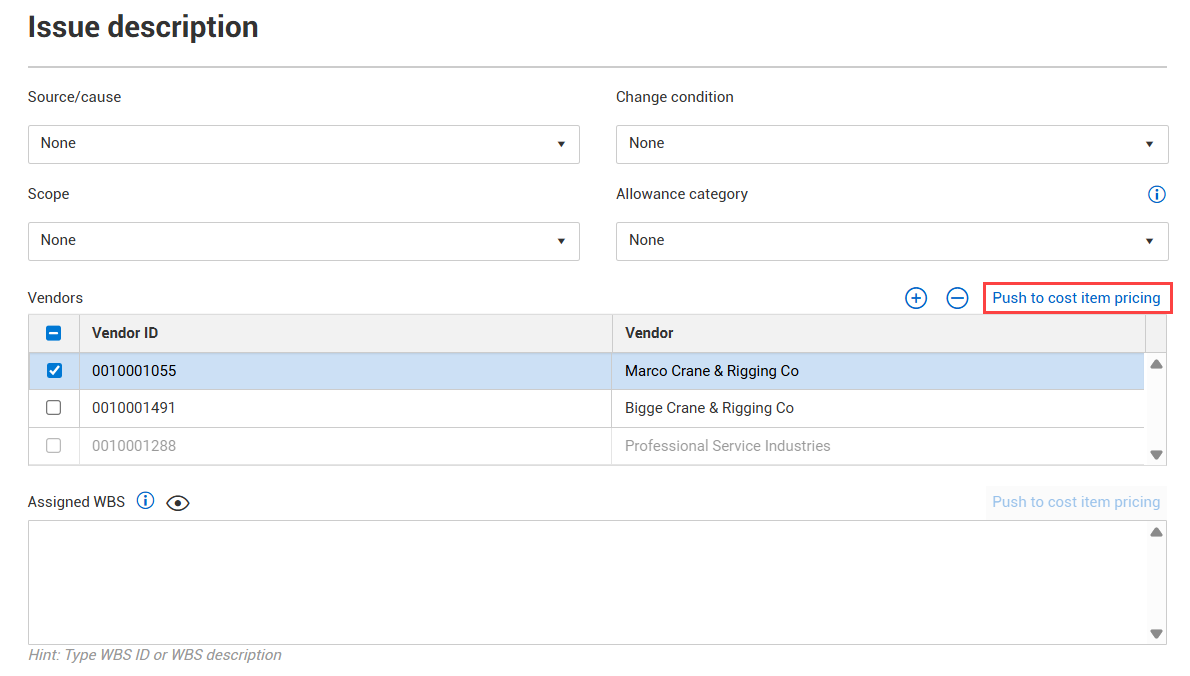
When you are ready to price the issue, you can add a vendor to cost item pricing.
Add a vendor to cost item pricing from the Details page when you have already added vendors to the issue and are adding cost items.
From the issue's Details page, select a vendor, and then click Push to cost item pricing in the Vendors field. Only vendors that have been added from the Details page can be pushed to cost item pricing. Vendors that have already been added to cost item pricing are shown as disabled.
The Select WBS to push to cost item pricing dialog box shows with a list of all contracts associated with the vendor and associated WBS phase codes.
Select one or more WBS phase codes, and then click Add. The vendor is added to the Vendor section of cost item pricing and shows on the pricing summary. It also shows as disabled in the Vendor list of the issue's Details page.
After you push the vendor to cost item pricing, you can associate the cost item to a vendor change order.
If you have pushed a vendor to cost item pricing by mistake and want to remove it, you must remove the cost item pricing item from the Pricing page and then remove the vendor from the Pricing summary. The vendor is then automatically removed from the Details page. When a vendor is associated to a vendor change order, you cannot delete the vendor from the Vendors section.
You can push the WBS codes you add to an issue directly to the cost item pricing for the issue, so you do not have to add them again when you configure cost item pricing.
This procedure adds the WBS codes to the cost item pricing. Any items that you add to the pricing are not pushed to the Details page. You can add them manually.
On the Issue Details page, enter the WBS codes you want to use for the issue in the Assigned WBS field.
Click Push to cost item pricing. The Push WBS to cost item pricing dialog box opens.
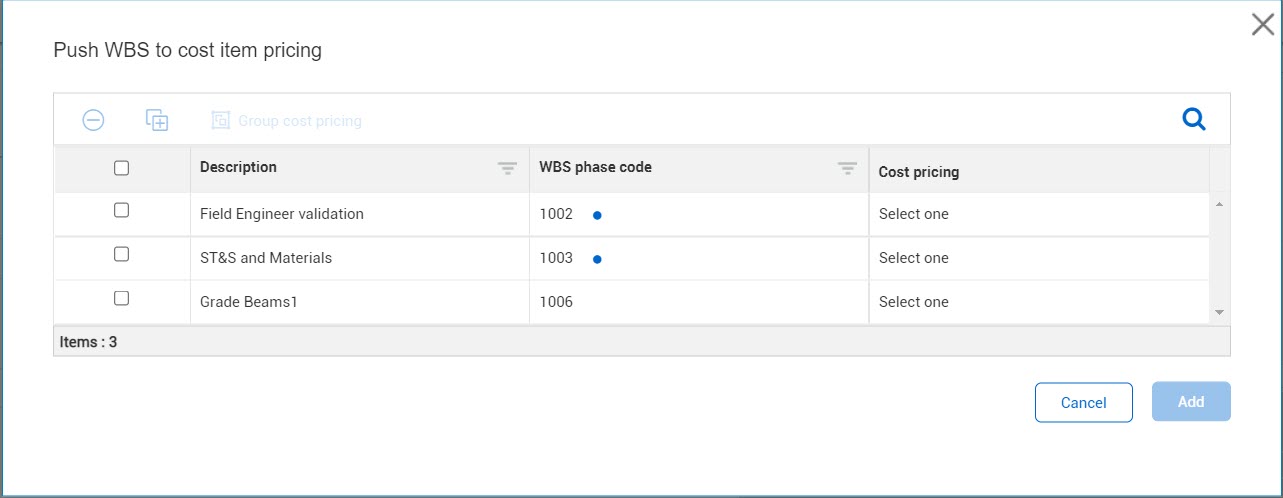
Select the WBS codes you want to push to the cost item, and then click Add. The items are added to the pricing.
Items that are manually added on the Cost item pricing tab are not automatically added to the details. You must add them manually.
In the Select WBS to push to cost item pricing dialog box, a blue dot shows next to the WBS phase code to indicate that the vendor has already been added to the cost item pricing.
The Additional details section has expandable subsections for the following features:
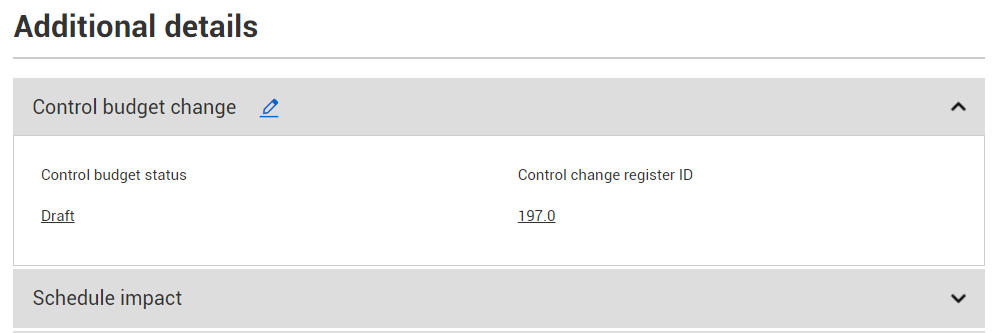
Control budget change
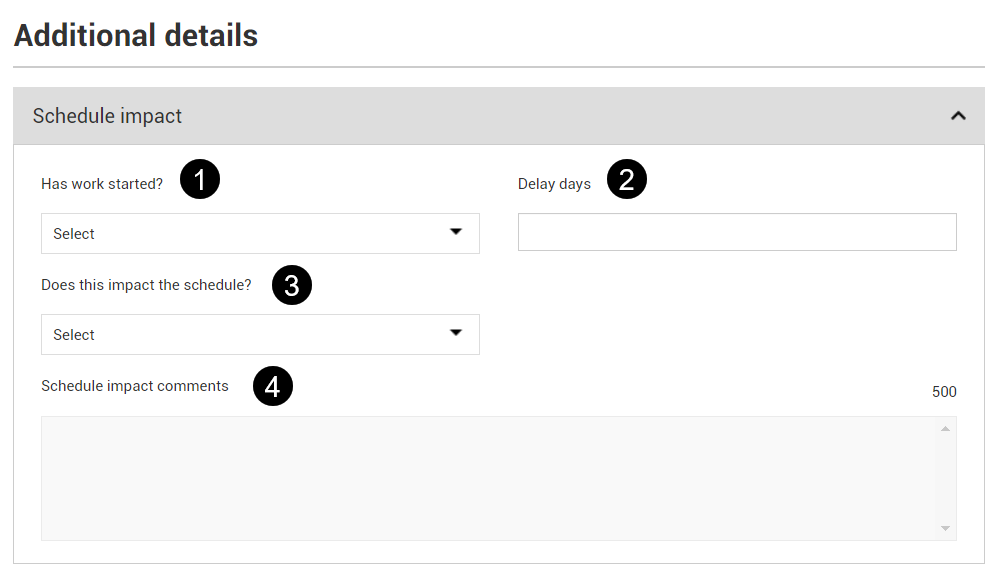
Schedule impact
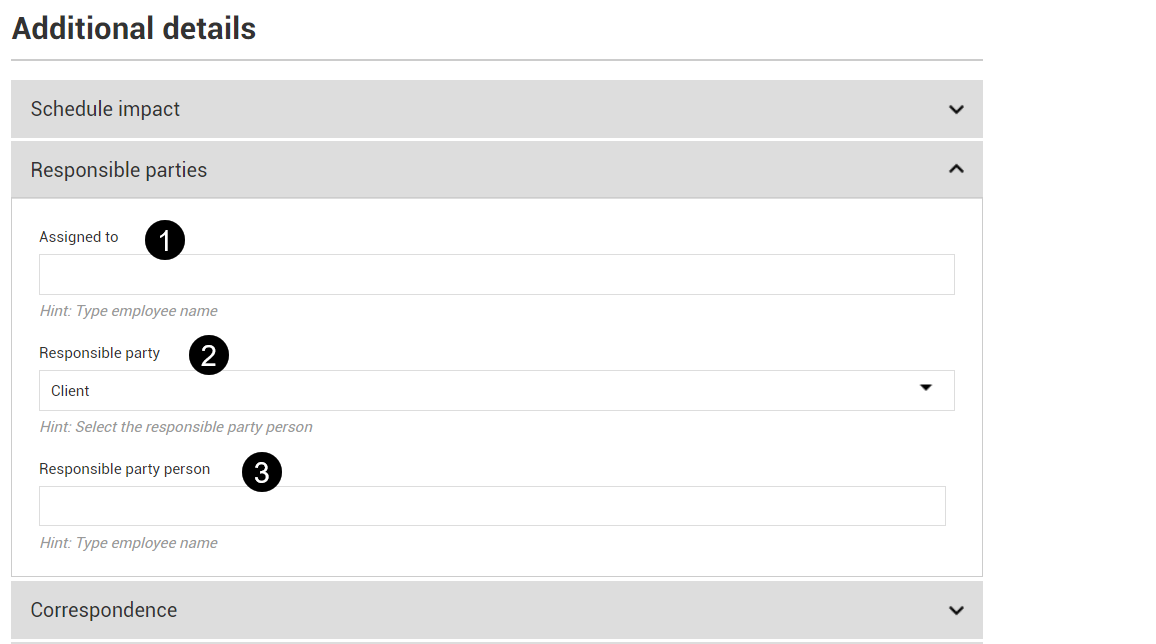
Responsible parties
Correspondence
Request for information
Tasks
Weather
Field information
Design information
Revenue category
Project values
Custom fields
Click the arrow in the subsection heading to expand the subsection.
| Title | Description |
|---|---|
| Control budget status |
The status of the budget move in InEight Control. You can click the link in the field to go to the Control Workspaces page. When this field contains a value, the heading for this section shows the corresponding status icon from Control. See Budget moves for more information about initiating a budget move. |
| Control change register ID | The change register ID from Control. You can click the link in the field to go to the Control Workspaces page. |
|
Title |
Description |
|
|---|---|---|
|
1 |
Has work started? |
Yes/No drop-down menu. |
| 2 | Delay days | The number of delay days associated with the issue. |
|
3 |
Does this impact the schedule? |
Yes/No/TBD drop-down menu. |
|
4 |
Schedule impact comments |
|
|
Title |
Description |
|
|---|---|---|
|
1 |
Assigned to | Validated drop-down list of users assigned to current project. |
| 2 | Responsible party | The job title or role responsible for the issue. |
|
3 |
Responsible party person | The person who is responsible for the issue. This is a free text field. |
|
Title |
Description |
|
|---|---|---|
|
1 |
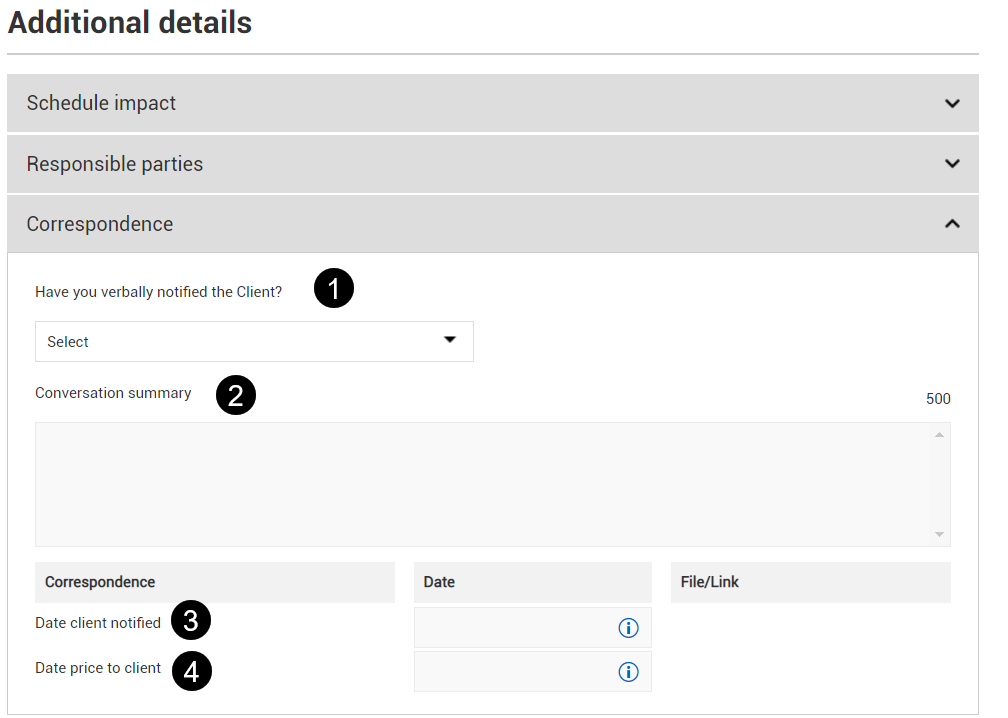
Have you verbally notified the client? |
Yes/No drop-down menu. |
|
2 |
Conversation summary |
|
| 3 | Date client notified | The date the client was notified. An information icon in the Date column shows the specific supporting document that must be attached to populate the date. You can add the document on the Supporting documents page. After a document is added, a link is shown in the File/Link column. |
| 4 | Date price to client | The date the price was communicated to the client. An information icon in the Date column shows the specific supporting document that must be attached to populate the date. You can add the document on the Supporting documents page. After a document is added, a link is shown in the File/Link column. |
RFIs are often a result of an issue. You can manually add RFI documents from this section or from the Supporting Documents page. If you manually upload an RFI, only the Title and RFI No. columns are filled. The Status column is only filled when you add an RFI from InEight Document. The heading for the Request for Information section includes a counter so you can quickly see the number of associated RFIs the issue has.
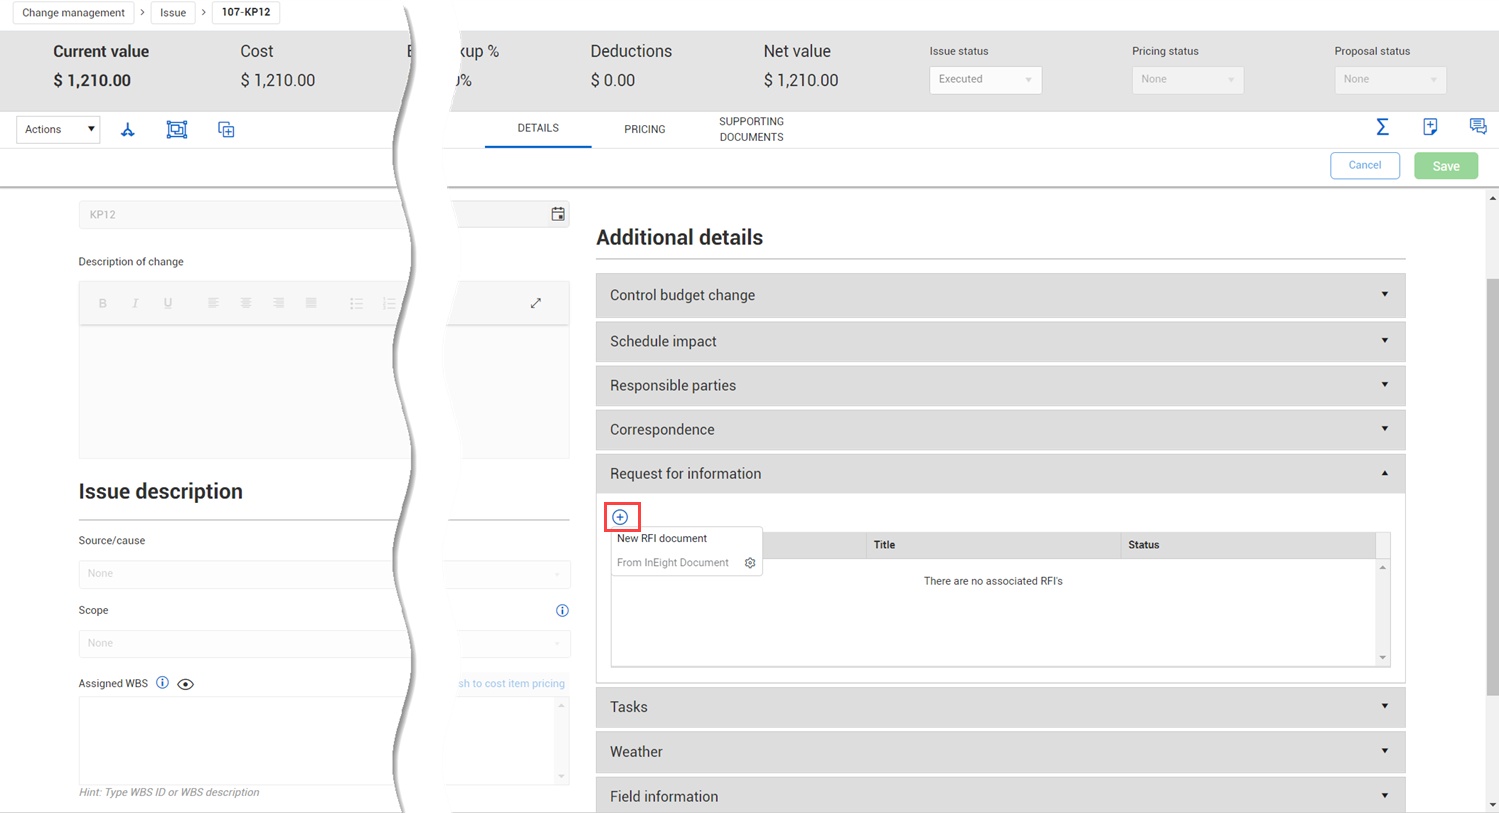
To add an RFI document from this section, click the Add Request for information icon, and then select whether to add a new document or a document from InEight Document.
Although you can add an RFI to a PCO or CCO, the Request for information section only shows for issues.
|
Title |
Description |
|
|---|---|---|
|
1 |
Task count | The number of pending and overdue tasks for the issue. |
|
2 |
Task title | The name of the task. The name is a link to the task in InEight Compliance. |
|
3 |
Task person | The name of the person assigned to the task. |
| 4 | Due date | The date the task is due. Overdue tasks are highlighted in red. |
| 5 | State | The state of the task (scheduled, pending, overdue, complete). Pending tasks are highlighted in yellow; overdue tasks are highlighted in red; |

|
Title |
Description |
|
|---|---|---|
|
1 |
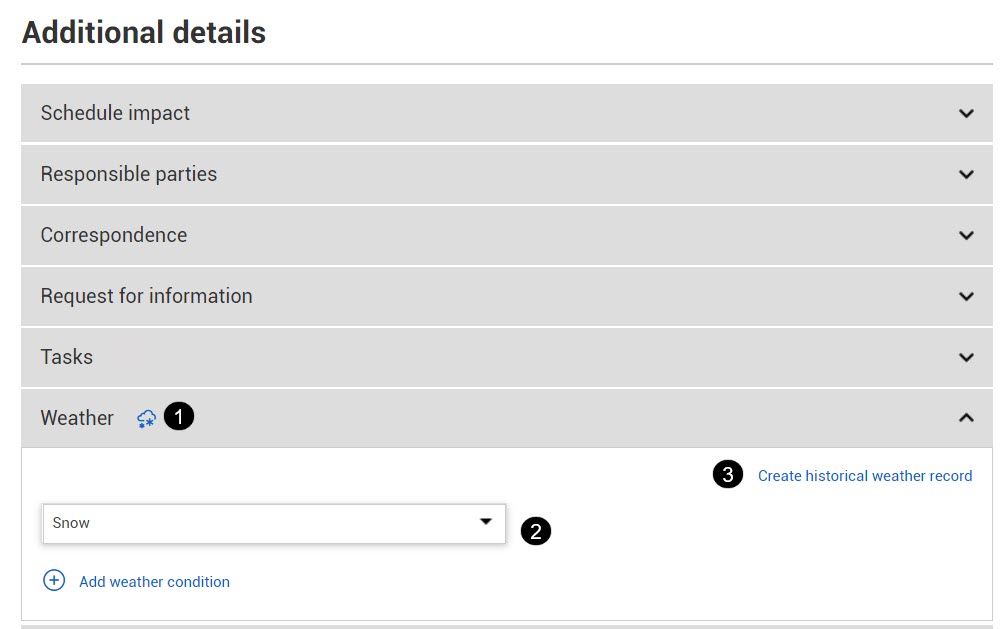
Weather heading | Lets you see at a glance the first weather condition assigned in the issue. |
|
2 |
Weather condition | You can select a weather condition from the drop-down list. An icon for the weather condition is shown in the Weather heading. You can select multiple weather conditions (for example, snow and wind), but only the first icon shows in the heading. |
|
3 |
Create historical weather record |
Lets you create a historical weather record for a seven-day period. The historical weather record uses the longitude and latitude from the project details to give a precise report of the weather conditions for the specified period. You can specify a start date that is up to one year before the current date. The end date can be up to seven days after the start date. The conditions include the temperature, weather condition, wind speed in meters per second and miles per hour, and precipitation. Change creates a PDF of the record and stores it in the Supporting documents tab for the issue. |
You can create a historical weather record for a seven-day period within the last year.
If you choose a start date that is less than seven days from the current date, the report is for the period from the start date to the current date. You cannot choose a date that is older than a year from the current date.
From the Issue Details page, expand the Weather section in the Additional details.
Click Create historical weather record. A weather record dialog box opens.
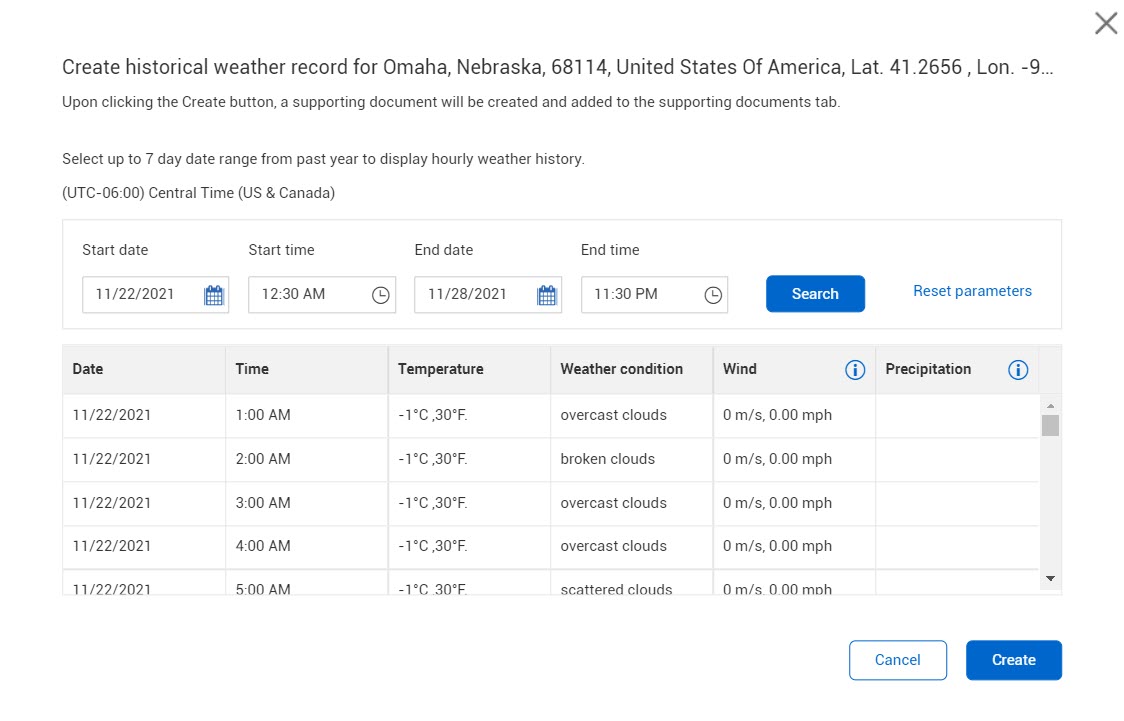
Enter a start date and time and end date and time, and then click Search. Change calls a weather API and then returns hourly weather conditions for each hour.
Click Create. Change creates a PDF of the weather record and stores it in the Supporting documents tab for the issue.
|
Title |
Description |
|
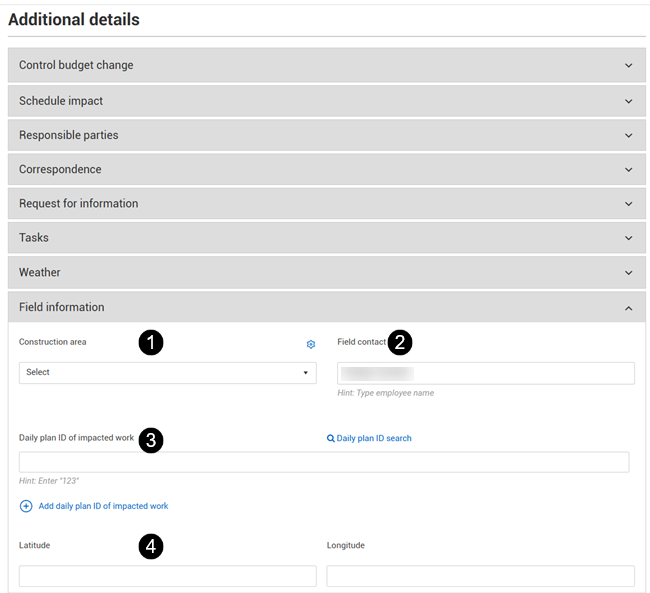
|---|---|---|
|
1 |
Construction Area |
The construction area associated with the issue. Select from a list of construction areas defined in InEight Platform from the drop-down menu. The Settings icon is a shortcut to the Construction areas configuration (project > Project values > Area), so you can configure a new construction area, if needed. |
| 2 |
Field Contact |
Validated drop-down list of users assigned to current project. |
|
3 |
Daily Plan ID of impacted work |
The daily plan ID associated with the issue. You can click the Add daily plan ID of impacted work button to add additional daily plan IDs. The daily plan ID is for reference only. You can click the Daily plan ID search icon to search for plan IDs in InEight Plan or InEight Progress. The Daily plan ID search lets you select operators, and the search returns plan IDs that meet the search criteria. Values selected from the search results are hyperlinked to the fields in Plan or Progress. |
|
4 |
Latitude and Longitude | The latitude and longitude of the construction area associated with the issue. These fields are for reference only. |
|
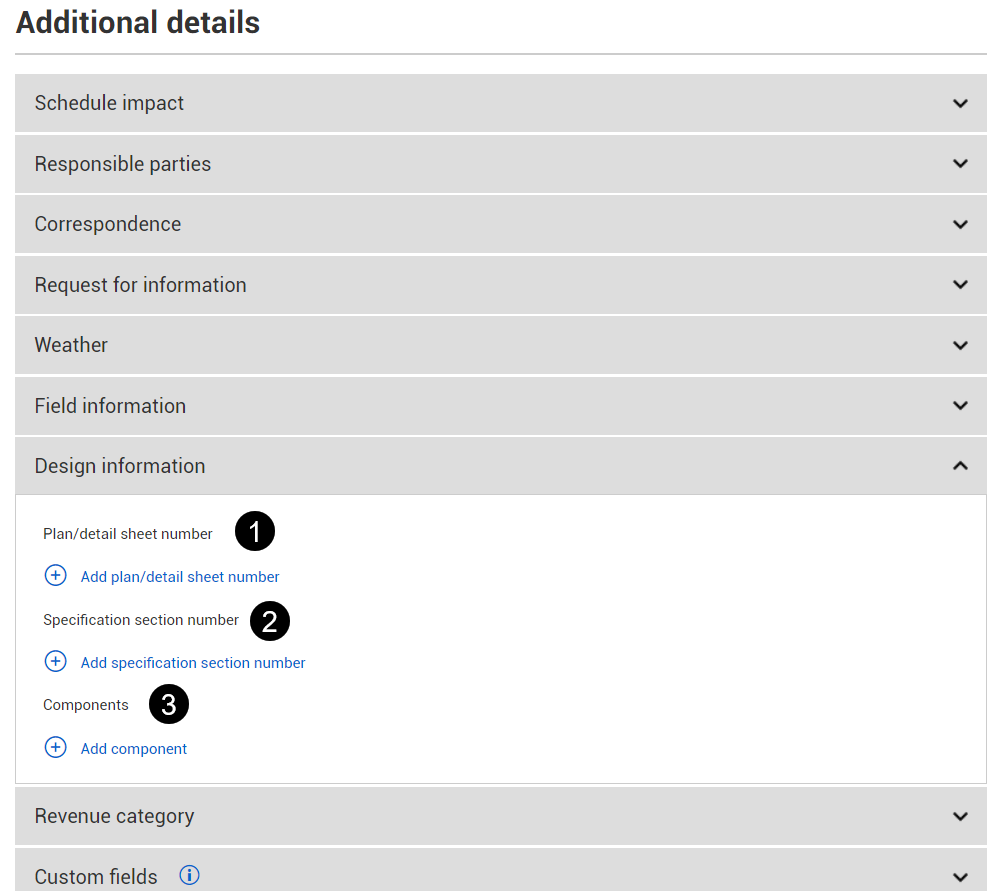
Title |
Description |
|
|---|---|---|
|
1 |
Plan/detail sheet number |
Click the Add link to display a field to enter plan/detail sheets – optional entry field. |
|
2 |
Specification section number |
Click the Add link to display a field to enter specification section numbers – optional entry field. |
|
3 |
Components |
Click the Add link to display a field to enter related components – optional entry field. |
|
Title |
Description |
|
|---|---|---|
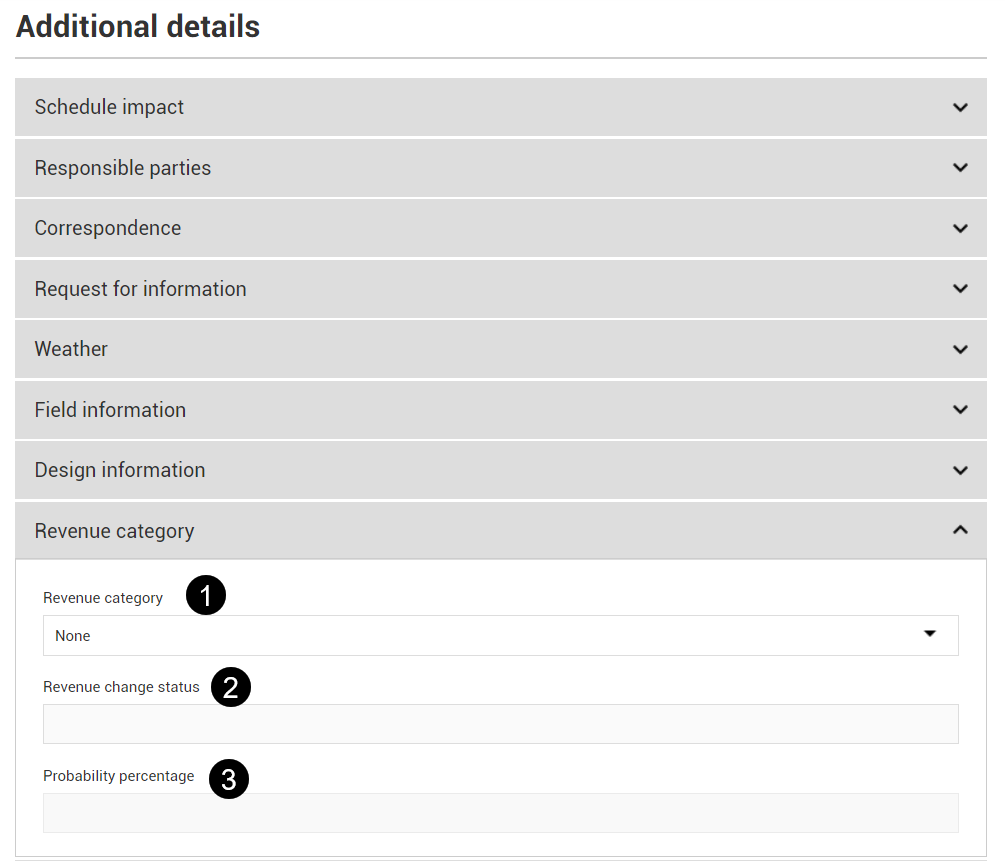
| 1 | Revenue category | The revenue category for the issue. The revenue categories are defined in the organization master data. You can select the category from a drop-down list. |
| 2 | Revenue change status | The change status of the revenue category. This field is read-only. |
| 3 | Probability percentage | The probability percentage based on the settings in the master data. This field is read-only. |
The Project Values section shows the project values configured for the project. For each project value, you can select a value from the drop-down list. Each field has a Settings icon that takes you to the Available project values page of the project. You can add project values or change the status of existing project values with the applicable permission.
Custom fields include Issue custom lists 1 and 2 and Issue custom fields 1-4.
Additional Information
9977 N 90th Street, Suite 250 Scottsdale, AZ 85258 | 1-800-637-7496
© 2024 InEight, Inc. All Rights Reserved | Privacy Statement | Terms of Service | Cookie Policy | Do not sell/share my information